How to Import Historical Data into MT4 (Windows)
MT4 has the capability to import historical data for purposes such as backtesting.
Here, we introduce how to import 1-minute data into an MT4 setup specifically for backtesting, to avoid overwriting data on the server used for trading.
You can download the historical data from Titan FX here.
Download Historical DataPreparing for Data Import
Proxy Server Settings
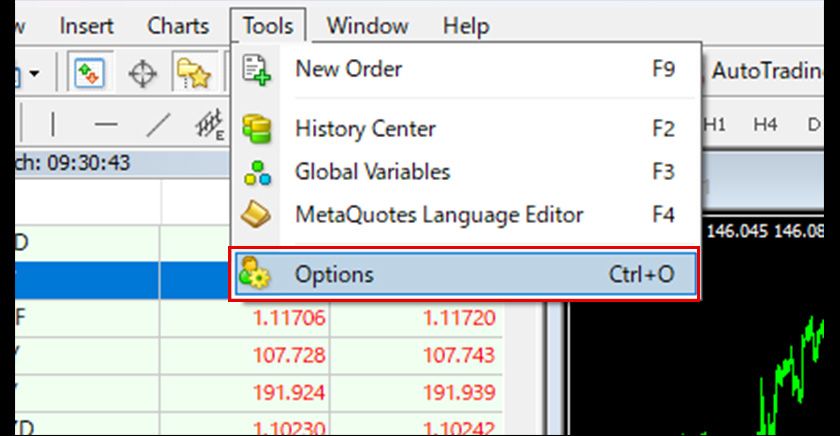
First, configure the settings to not connect to the server to avoid receiving new data. While logged into a TitanFX account (a demo account is fine) on the MT4 prepared for backtesting, select "Options" from the "Tools" menu.
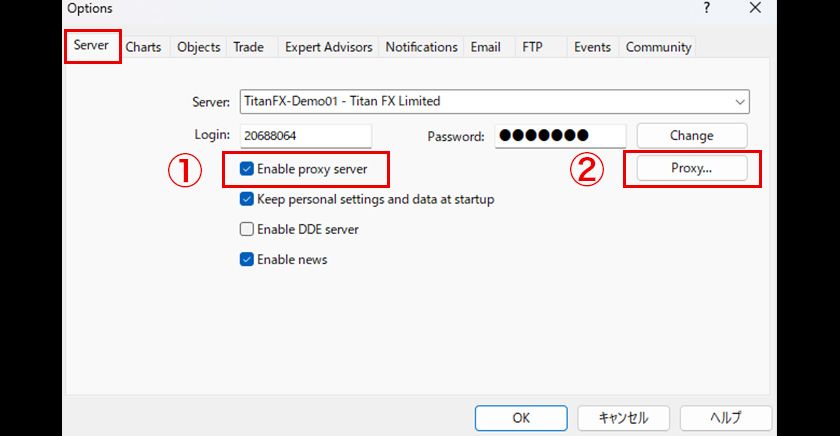
In the "Options" dialog that appears, check the "Enable proxy server" in the "Server" tab and click the "Proxy..." button on the right.
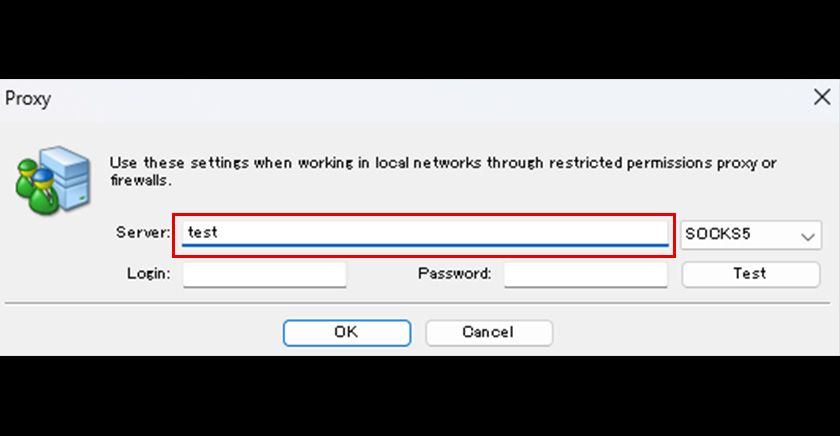
In the "Proxy" dialog that appears, enter appropriate alphanumeric characters in the "Server" section and click "OK".
Setting Maximum Bar Numbers
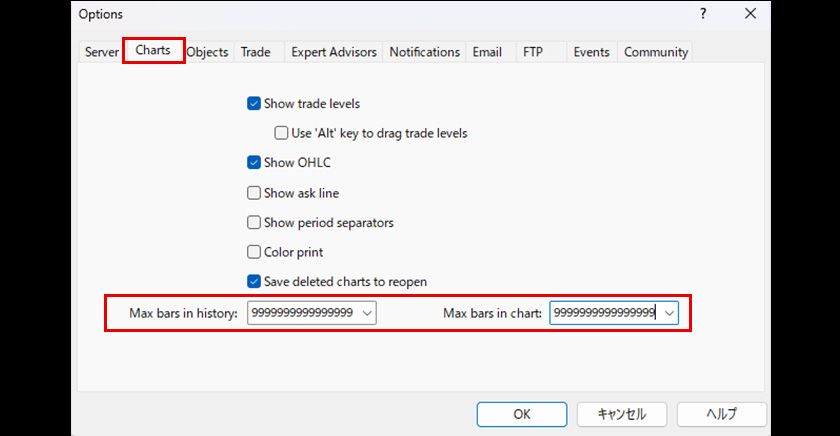
Move to the "Charts" tab in the "Options" dialog, enter as many 9s as possible into the fields for "Max bars in history" and "Max bars in chart", and click "OK".
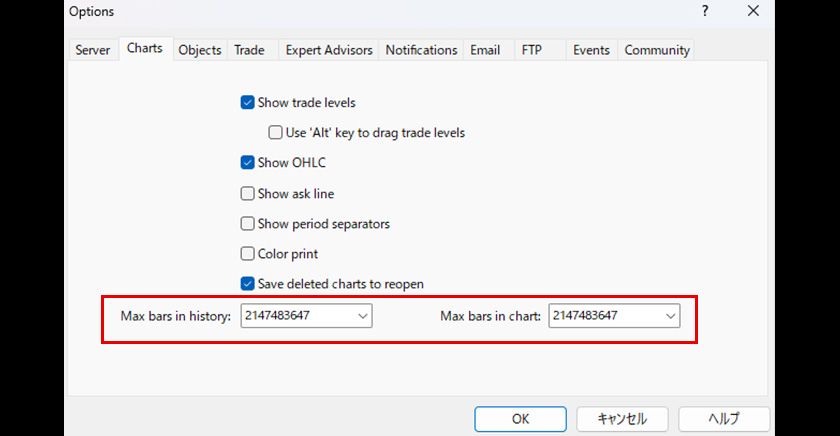
When you reopen the "Options" dialog, it will be set to the maximum values. Once done, restart MT4. After restarting, "No connection" will be displayed in the bottom right of MT4, and no new rates will be received.
Deleting Existing Historical Data
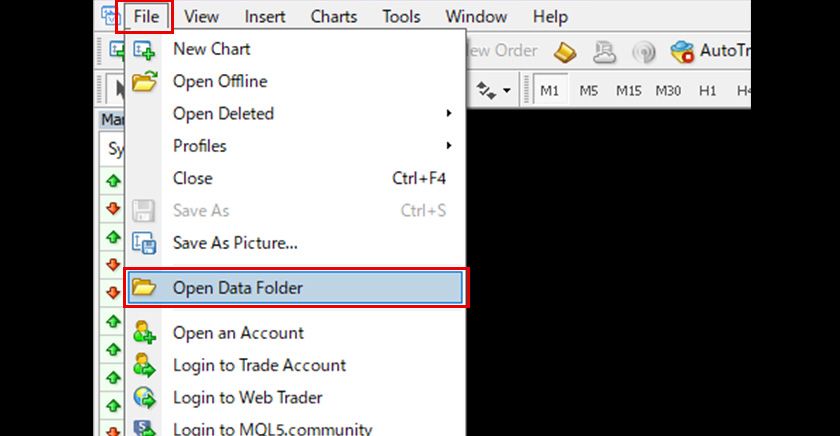
To avoid mixing with the data to be imported, delete the historical data held in MT4. Select "Open Data Folder" from the "File" menu in MT4.
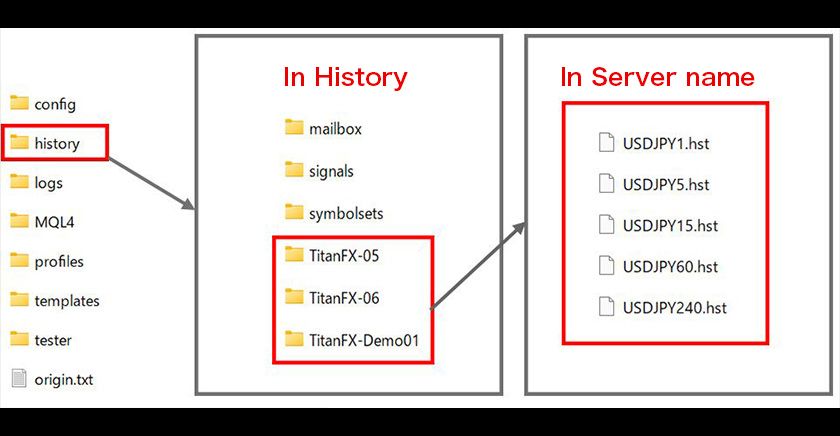
Delete all files named after the instrument plus numbers plus .hst in the "history" folder within the folder of the logged-in "Server Name" (like "TitanFX-05" or "TitanFX-Demo01"). After deletion, restart MT4.
Importing Data
Importing 1-Minute Data
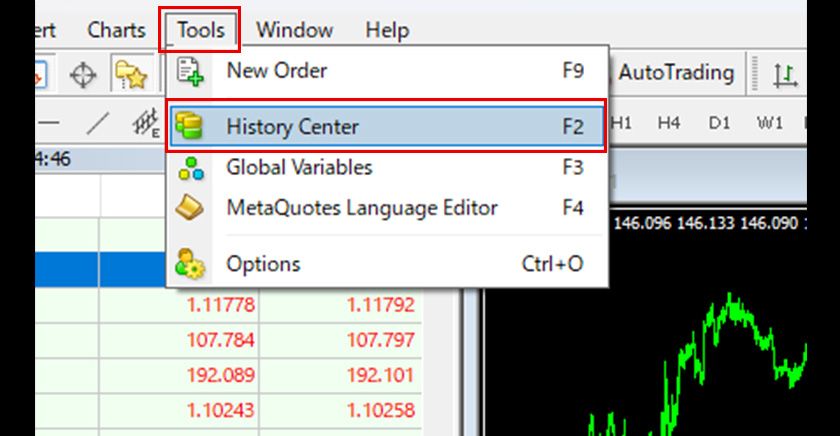
Select "History Center" from the "Tools" menu of MT4.
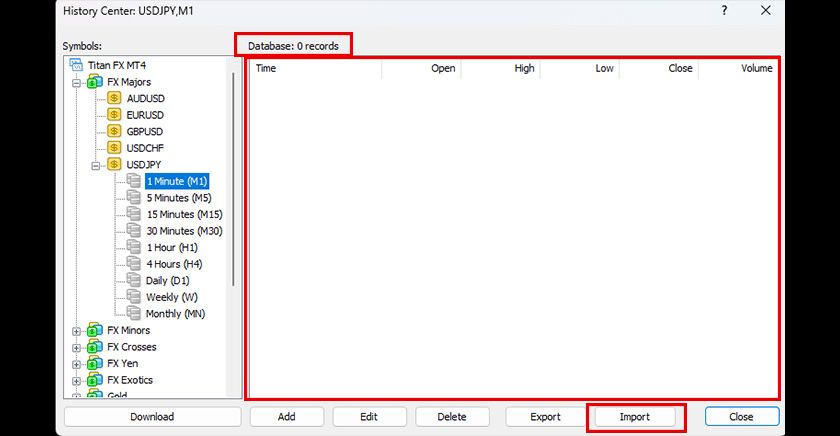
Select the 1-minute data of the instrument you want to import from the left side of the "History Center" dialog that appears. Make sure there is no data in the state, and click the "Import" button below.
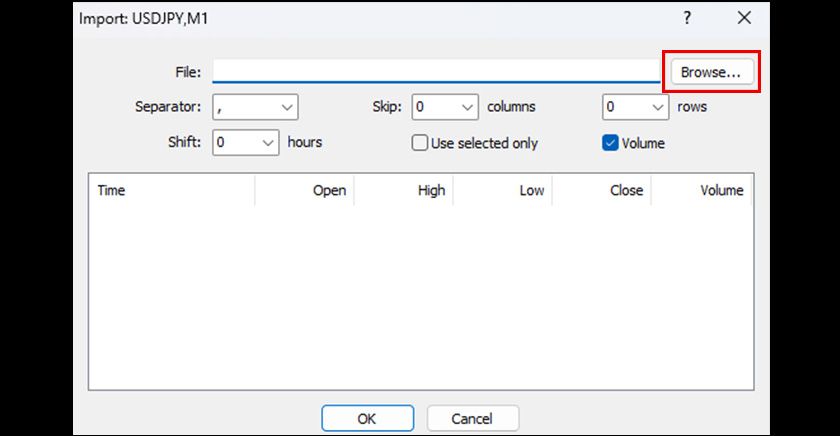
In the "Import" dialog that appears, click the "Browse" button on the right of the filename, and select the file of the 1-minute data to be imported.
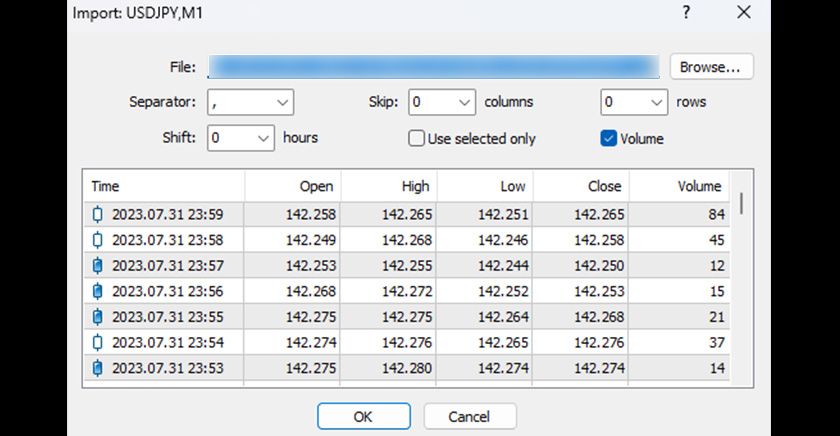
Once the import data is displayed, click "OK" to execute the import. If there are multiple files, click the "Import" button again in the "History Center" and import the data. After completing the data import, restart MT4.
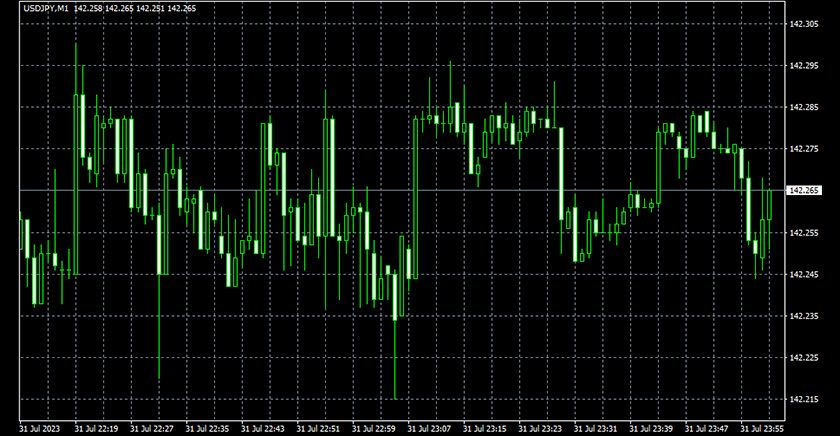
Open the chart of the imported instrument and check if the data has been reflected.
Creating Data Other Than 1-Minute
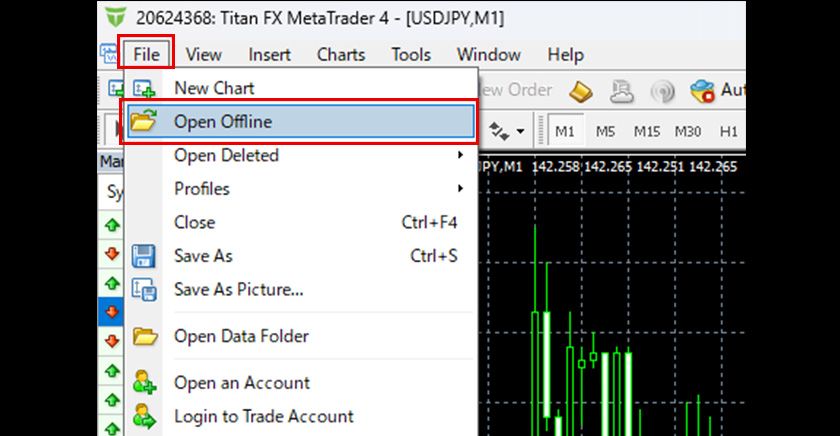
Next, create other timeframe data based on the 1-minute data. Select "Open Offline" from the "File" menu in MT4.
Select the 1-minute data of the instrument you want to import from the left side of the "History Center" dialog that appears. Make sure there is no data in the state, and click the "Import" button below.
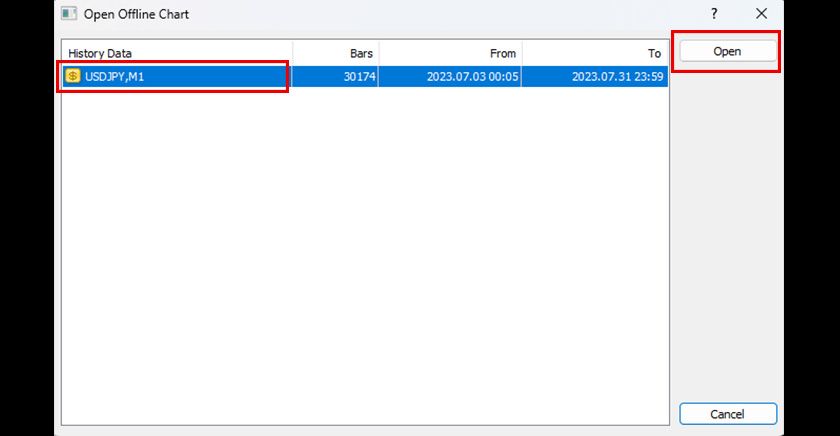
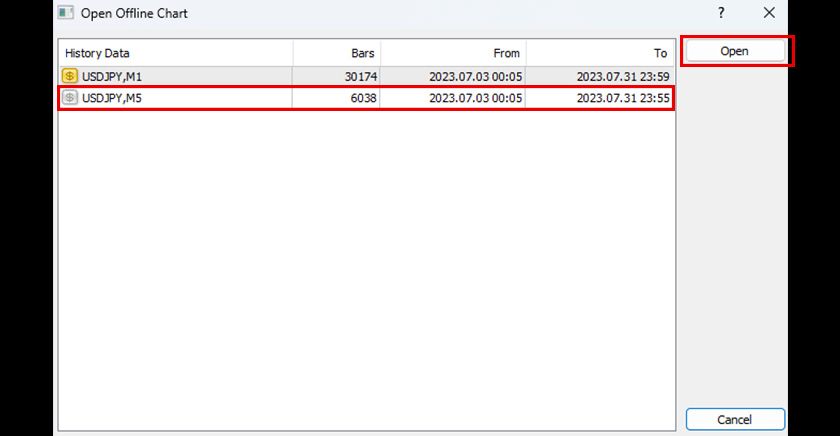
Select the 1-minute data (Instrument name, M1) of the imported currency pair, and click the "Open" button on the right.
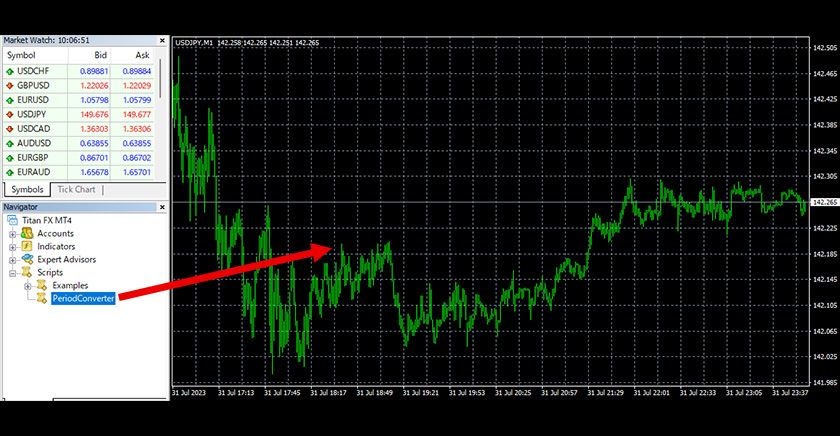
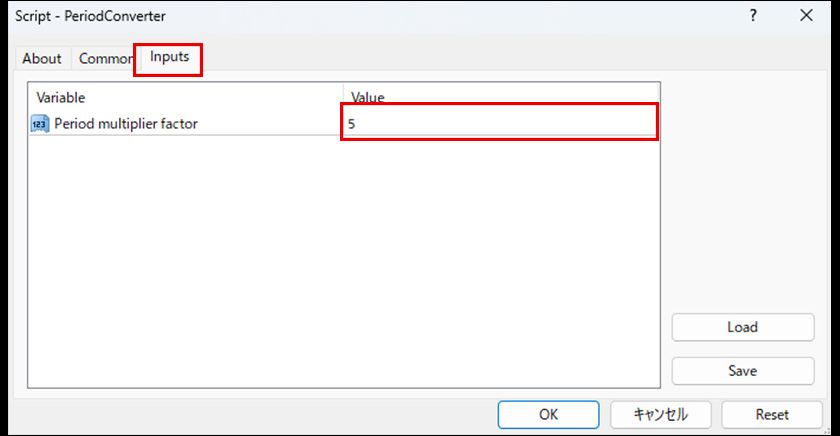
Once the offline chart is displayed, drag and drop the "PeriodConverter" from the "Scripts" in MT4's "Navigator" onto the chart. In the "Parameter Input" tab of the settings screen that appears, enter "5" in the "Period multiplier factor", click "OK", and the 5-minute data is generated. Then, repeat the process with the "PeriodConverter" on the chart for other timeframe data (15 (15-minute), 30 (30-minute), 60 (hourly), 240 (4-hour), 1440 (daily), etc.), similarly creating the data. When prompted with the dialog "Do you want to stop the PeriodConverter and apply PeriodConverter to the chart xxxx, M1?" during subsequent drops of the "PeriodConverter" onto the chart, click "Yes" to continue.
When you select "Offline Charts" again from the MT4 menu, the list of offline charts is displayed. Here you can confirm that data other than the 1-minute data has been created. Once the data creation is confirmed, close the offline chart. Afterwards, you can display charts other than the 1-minute chart and use the data generated for backtesting and other purposes.